チュートリアル:最初の Hello COBOL World アプリケーションの作成
本チュートリアルでは、最初の Hello COBOL World アプリケーションの作成手順と Visual Studio 統合開発環境 (IDE) の基本的な機能について説明します。
プロジェクトの作成
- To start the Visual Studio IDE:
If this is the first time you have started Visual Studio on your machine, you are prompted to specify default environment settings.Choose General Development Settings.
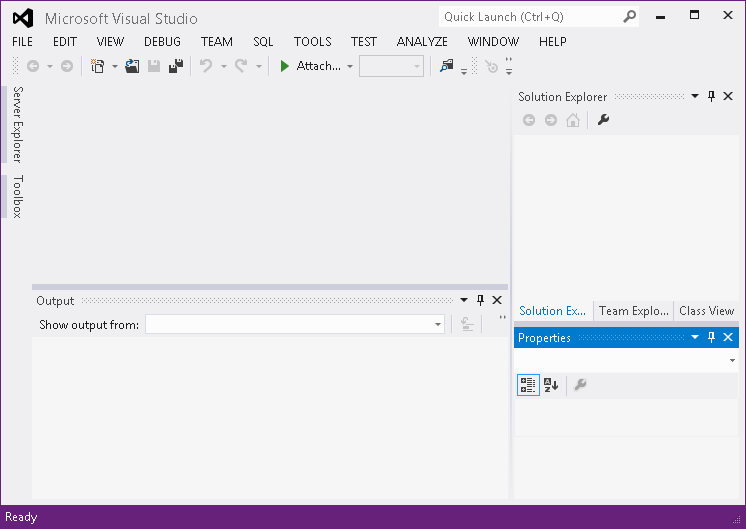
The windows you see open in Visual Studio and their layout depend on whether you have used the IDE before and on the edition of Visual Studio that you might have installed on your machine.You can move, resize and minimize windows which is why they may not look exactly like described here.
- The Start Page which you can close.
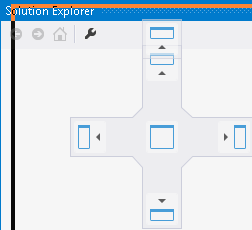
- The Solution Explorer window which gives a direct view of what is on disk for your solutions.
A solution is a holding place for projects that relate to the solution.For example, the solution you are going to work with contains two projects - a batch project and an online project.
- Bottom right is a Properties window which shows the properties of the currently selected item in the Solution Explorer.
- Output window - displays the results of tasks and from compiling your applications.
- Error List Window - displays details about any errors that might be present in the code.
- Project Details Window which gives a logical view of your COBOL application.
- The main activity window at the top the IDE, the Editor, is where you edit or debug the sources.This window is currently empty.
- Apart from the menus, there are a number of buttons in the toolbar, which vary depending on what you are currently doing with the IDE.
- Experiment with resizing, minimizing and restoring the windows.
- [File > New > Project] を選択します。
- [New Project] ダイアログ ボックスの左側の [Installed > Templates > COBOL] で [COBOL] が選択されていることを確認します。
- [COBOL] の下にある [Native] をクリックし、中央のペインで [Console Application] を選択します。
- HelloCOBOLWorld などのプロジェクトの名前を指定し、必要に応じて場所を指定して、[OK] をクリックします。
ソリューション (プロジェクトのコンテナー) とスケルトン COBOL プログラムを含むプロジェクトが作成されます。ソリューションとプロジェクトは、ソリューション エクスプローラー ビューに表示されます。プログラムは Visual Studio エディターでロードされます。
ソース ファイルの追加
プロジェクトで新しいファイルを作成する方法を確認するために、Hello COBOL World アプリケーションのソース コードを保持する新しいソース ファイルを作成します。
- ソリューション エクスプローラーでプロジェクトを右クリックし、[Add > New Item] をクリックします。
- [Add New Item] ダイアログ ボックスで、[COBOL program] が選択されていることを確認します。
- helloworld.cbl などの名前を指定し、[Add] をクリックします。
プロジェクトにファイルが作成され、エディターで開かれます。
- プロジェクトを作成したときに作成されたスケルトン プログラムは削除してかまいません。削除するには、ソリューション エクスプローラーでプロジェクトの Program1.cbl を右クリックし、[Delete] をクリックします。
ファイルを削除することを確定します。
- 新しいファイル内のコードで、実行可能な文を追加する必要がある procedure division. を含む行に移動します。行の末尾にカーソルを置き、 Enter キーを押します。
ファイルに新しい行が作成され、カーソルが AB 領域の灰色の余白領域の直後に配置されます。デフォルトでは、COBOL エディターはスマート編集用に構成されており、カーソルは COBOL マージンの領域には配置されません。
- コンソールにテキストを出力するコードを入力します。
display 'Hello COBOL World!'.
- [File > Save All] をクリックします。
アプリケーションのビルド
実行可能なコードを追加したので、プロジェクトをビルドできます。これはコンソール アプリケーションを作成するプロジェクトであるため、プロジェクトのプロパティで指定されたプロジェクトのサブフォルダーに実行可能ファイルが作成されます。アプリケーションのビルド方法は、次のとおりです。
- ソリューション エクスプローラーでソリューションを選択し、[Build > Build Solution] をクリックします。
プロジェクトのビルドの進捗状況が [Output] ウィンドウに表示されます。ビルドが正常に完了すると、実行可能ファイルの場所が表示されます。ビルドで問題が発生した場合は、[Error List] ウィンドウが表示されます。このウィンドウは、[View] メニューから手動で開くことができます。
プロジェクトが正常にビルドされたら、アプリケーションを実行できます。